Will it fit your printer? Part sizes vs build plates
Will this part fit your resin printer? How to check a garage kit part against a Mars-class or Saturn-class build plate, and what to do when it doesn't.
Every raw part fits a Mars-class build plate in 174 of the 366 kits checked in my library, about half. To check a garage kit figure part, compare its three sorted sizes with your resin printer's sorted build plate sizes. If any part side is bigger than the matching plate side, tilt the part, split it or rescale the kit.
A Saturn-class plate takes every raw part in 308 of those kits, or 84%. The check comes first below, then each fix.
In this guide
- Will this part fit my printer?
- How to check a part's size in Lychee Slicer
- Is a Mars-class printer big enough for garage kits?
- What to do when a part is too big for your printer
- Tilting a part to fit
- Splitting a part that won't fit
- Rescaling a kit to fit
- Scale and part size
- Watch and read next
- Sources
Will this part fit my printer?
A part fits when its bounding box fits inside your printer's build volume, with the part lying on one of its faces. Every kit post on this site has a plate-fit line from this check, run on the STL files before anything is printed.
The bounding box is the smallest box that holds the whole part, with its sides parallel to the printer's axes. Its three sides are the numbers in kit posts, such as 190.3 × 240.8 × 128.5 mm.
The check keeps the part axis-aligned: flat, on its side or standing up, never tilted at an angle. A box has six axis-aligned orientations, and the check covers all six.
Mars-class vs Saturn-class build plate sizes
Printers differ in plate size, so the site groups them into two classes. The class numbers are rounded. In each entry, the sides already run from shortest to longest.
- Mars-class plate
- Short side: about 90 mm
- Long side: about 143 mm
- Height: about 175 mm
- Saturn-class plate
- Short side: about 123 mm
- Long side: about 219 mm
- Height: about 250 mm
- Elegoo Saturn 3 Ultra
- Short side: 122.88 mm
- Long side: 218.88 mm
- Height: 260 mm
- Elegoo Saturn 4 Ultra 16K
- Short side: 118.37 mm
- Long side: 211.68 mm
- Height: 220 mm
- Elegoo Saturn 4 Ultra 12K
- Short side: 122.88 mm
- Long side: 218.88 mm
- Height: 220 mm
- Elegoo Mars 5 Ultra
- Short side: 77.76 mm
- Long side: 153.36 mm
- Height: 165 mm
The class names come from Elegoo's Mars and Saturn printer lines. A printer from any brand belongs to a class by its build volume, not its name.
I print on four Elegoo Saturn 3 Ultras. As of October 2026, Elegoo lists its build volume as 218.88 × 122.88 × 260 mm. That is 0.12 mm short of the Saturn-class figure on the short side, and 10 mm taller.
As of October 2026, Elegoo lists the Saturn 4 Ultra 16K at 211.68 × 118.37 × 220 mm. Its short side is 4.63 mm under the Saturn-class figure, and its height is 30 mm under. Every part that fits a Mars-class plate fits the Saturn 4 Ultra 16K. Not every part that fits a Saturn-class plate does.
The Mars 5 Ultra and Saturn 4 Ultra 12K figures come from review pages, All3DP for the Mars 5 Ultra and MakerHacks for the Saturn 4 Ultra 12K, because Elegoo's own product pages don't show a build volume for them.
Small differences like these matter at the edges. Look up your own printer's build volume and use its exact numbers the same way.
The sort-and-compare test
You don't need to try six orientations by hand.
- Write down the part's three sizes.
- Sort them from shortest to longest.
- Sort your plate's three sides the same way. For the plates in the list above, that order is short side, long side, height.
- Compare shortest with shortest, middle with middle and longest with longest.
- Read the result. If no part side is bigger than its plate side, some flat orientation fits. If any one part side is bigger, no flat orientation fits.
The shortest side is usually the tight one. In every Saturn-class failure below, only the shortest side is over. A part with every side wider than 90 mm can never fit a Mars-class plate flat, however you turn it.
One part against both plates
In Lion Realm's Yuki Tsukumo kit, the largest part isn't Yuki. It is curse.stl, the cursed spirit, at 190.3 × 240.8 × 128.5 mm. Sorted, that is 128.5, 190.3 and 240.8 mm.
- Side of
curse.stl: Shortest- Part: 128.5 mm
- Mars-class plate: 90 mm: over by 38.5 mm
- Saturn-class plate: 123 mm: over by 5.5 mm
- Saturn 3 Ultra: 122.88 mm: over by 5.62 mm
- Side of
curse.stl: Middle- Part: 190.3 mm
- Mars-class plate: 143 mm: over by 47.3 mm
- Saturn-class plate: 219 mm: 28.7 mm spare
- Saturn 3 Ultra: 218.88 mm: 28.58 mm spare
- Side of
curse.stl: Longest- Part: 240.8 mm
- Mars-class plate: 175 mm: over by 65.8 mm
- Saturn-class plate: 250 mm: 9.2 mm spare
- Saturn 3 Ultra: 260 mm: 19.2 mm spare
- Side of
curse.stl: Result- Part: —
- Mars-class plate: Does not fit
- Saturn-class plate: Does not fit
- Saturn 3 Ultra: Does not fit
The short side decides it. The cursed spirit's shortest side is 5.5 mm wider than a Saturn-class plate's short side. On my Saturn 3 Ultra the gap is 5.62 mm. The kit post's verdict is that this part has to be cut.
More parts from kit posts
Body.stlraw, Tanuki's Vault Boy- Bounding box: 49.7 × 89.0 × 65.0 mm
- Mars-class plate: Fits
- Saturn-class plate: Fits
Body.stlpresupported, Vault Boy- Bounding box: 86.7 × 61.8 × 100.0 mm
- Mars-class plate: Fits, as set up
- Saturn-class plate: Fits
- The disc, Chibi Station's Milo
- Bounding box: 114.5 × 10.5 × 114.5 mm
- Mars-class plate: Fits, on its edge only
- Saturn-class plate: Fits
Sand_7_SUP, Tanuki's Rock Lee- Bounding box: 125.1 × 99.9 × 122.0 mm
- Mars-class plate: Does not fit
- Saturn-class plate: Fits
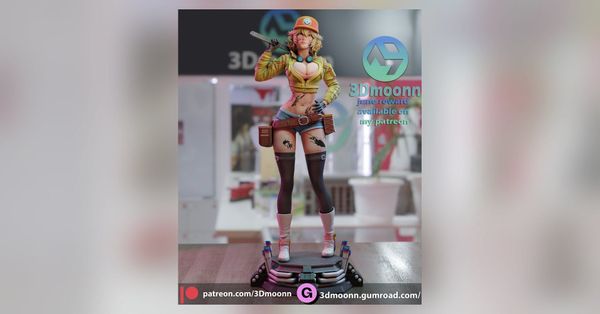
- Base, presupported, 3Dmoonn's Cindy Aurum
- Bounding box: 112.6 × 105.8 mm footprint
- Mars-class plate: Only turned on its side
- Saturn-class plate: Fits
Chibi_Station_Aira_Hair.stl, Chibi Station's Aira Shiratori- Bounding box: 152.2 × 181.2 × 125.2 mm
- Mars-class plate: Does not fit
- Saturn-class plate: Over by 2.2 mm
yuki part 1.stl, Yuki Tsukumo- Bounding box: 217.7 × 123.2 × 190.3 mm
- Mars-class plate: Does not fit
- Saturn-class plate: Over by 0.2 mm
yuki part 2.stl, Yuki Tsukumo- Bounding box: 193.2 × 126.6 × 238.1 mm
- Mars-class plate: Does not fit
- Saturn-class plate: Over by 3.6 mm
A few of these need a word.
The Milo disc fits a Mars-class plate only stood on its edge. Laid flat, both of its 114.5 mm sides are wider than the plate's 90 mm short side.
Rock Lee's Sand_7_SUP has a shortest side of 99.9 mm. That is 9.9 mm over a Mars-class short side, so it needs a Saturn-class plate. It is the only part of that kit that does.
Cindy Aurum's base is set up on a 112.6 × 105.8 mm footprint in the studio's presupported scene. That footprint is 15.8 mm wider than a Mars-class short side. The check counts it as fitting a Mars-class plate turned on its side, but the supports aren't built for that. On a Mars-class printer, re-orient and re-support the base, or support the raw base yourself.
Yuki's two presupported plates are files the studio laid out and supported. Both run over a Saturn-class plate on their tight axis: 0.2 mm and 3.6 mm. On my Saturn 3 Ultra the overruns are 0.32 mm and 3.72 mm. The kit post flags plate 1 as worth testing in the slicer, because the overrun is so small.
What the check doesn't see
The bounding-box check is quick and repeatable. It also leaves things out. Keep these in mind when you read a plate-fit line.
- Supports. A raw STL file's box has no supports. Supports and a raft lift the part off the plate, so a raw part needs height to spare. Lychee Slicer has a setting, Auto Lift on import, that lifts objects off the build plate when you import them.
- Presupported orientation. The check tries all six faces. A presupported file only works in the orientation the studio set it up in. Turn it onto another face and its supports point sideways.
- Tilts. The check never tilts a part. A part that fails may still fit tilted. See "Tilting a part to fit" below.
- The shape inside the box. A loop of hair or a coiled tail fills little of its box. Those are the parts that tilting can help.
- The rest of the plate. The check looks at one part at a time. Several parts that each fit may not fit together.
How to check a part's size in Lychee Slicer
You can run the site's check on any part in a few minutes. Open the part in your slicer, read its size along X, Y and Z before you turn it, then run the sort-and-compare test above. In Lychee Slicer, the Scale tool shows the sizes, the Rotate tool lines a part up with the plate, and Arrange lays several parts out by their outer dimensions. Supports and the raft add height under the part, so check the height again once it's supported.
Two other Lychee tools help with size. The Measure tool measures the distance between two points you click. Physical Size Mode, in the At Scale view, shows the scene at its real printed size on your screen. To set it up, you measure a reference line on screen with a ruler or calipers.
Is a Mars-class printer big enough for garage kits?
For about half the kits in my library, yes. The library holds 519 kits from 18 studios. These are the kits I have, not everything each studio offers. As of 5 October 2026, 366 of those kits have had every raw part checked.
- Every raw part fits a Mars-class plate
- Kits: 174
- Share: 48%
- At least one raw part needs a Saturn-class plate
- Kits: 134
- Share: 37%
- At least one raw part is bigger than a Saturn-class plate in every flat orientation
- Kits: 58
- Share: 16%
The shares are rounded, so they add up to 101%.
So a Mars-class plate prints every raw part in about half these kits. A Saturn-class plate prints every raw part in 308 of them, or 84%. About 1 kit in 6 has a part that must be tilted, cut or printed on a larger printer.
Plate fit also feeds the print rating in each kit post. A print rating of 1 needs everything to fit a Mars-class plate. A part that exceeds a Saturn-class plate in every flat orientation is one of the things that makes a 5. How kits are rated here has the full scale.
Choosing which printer to buy is a separate question. What size resin printer you need for figures covers that choice.
What to do when a part is too big for your printer
Work through these options in order. The early ones change the least about the kit.
- Check the download for a split version. A split version is the studio's own answer to plate size. In NomNom's Jiraiya, all 47 parts of the split set fit a Mars-class plate. The guide to garage kit figures explains each version.
- Tilt the part, if its material runs on a diagonal, such as a loop of hair or a sword. Tilting can't save a solid block.
- Split the part yourself in Lychee, at a seam another part hides.
- Rescale the whole kit, if a smaller figure suits you. Every part must get the same factor.
- Print the part on a larger printer, or buy the kit printed. The shop sells printed, unpainted kits, with US shipping only.
Each fix has its own section below.
Tilting a part to fit
Tilting means turning a part off its flat faces, at an angle to the plate. It can make some parts fit that fail the flat check. It also costs layers, time and supports.
When tilting helps and when it can't
Tilting a solid, box-shaped part never makes it fit a gap narrower than its own shortest side. Turn a box any way you like. Its width along any axis stays at least as wide as that shortest side.
So tilting can't save a block. It helps parts whose material runs on a diagonal inside the box. Examples are a sword held across the body, a long lock of hair, a loop and a coil. For those parts, the box around the tilted part can be smaller than the flat one.
Aira's hair is that kind of part. It is a loop of strands, not a solid block. Laid flat, it overruns a Saturn-class short side by about 2 mm. Tilted, it may clear, so try the tilt in your slicer before you plan a cut.
The plate's diagonals
The longest straight line that fits in a build volume runs corner to corner. These are the limits for a very thin part, such as a spear or a staff.
- Mars-class plate
- Across the plate, lying flat: 169 mm
- Up the long side, tilted: 226 mm
- Corner to corner, tilted both ways: 243 mm
- Saturn-class plate
- Across the plate, lying flat: 251 mm
- Up the long side, tilted: 332 mm
- Corner to corner, tilted both ways: 354 mm
- Elegoo Saturn 3 Ultra
- Across the plate, lying flat: 251 mm
- Up the long side, tilted: 340 mm
- Corner to corner, tilted both ways: 361 mm
The first line turns the part on the plate without lifting it. The other two tilt it up into the build height.
Each number is a square root you can rerun. Across a Mars-class plate: √(143² + 90²) = √28,549 = 169 mm. Up the long side of a Saturn-class plate: √(219² + 250²) = 332 mm. Corner to corner adds the third side under the root.
Real parts never reach these numbers. A part has thickness. Supports and a raft need room at the bottom. Leave a margin of several millimetres.
What tilting costs
Layers. A resin printer builds one layer at a time, and the layer count comes from the height of the whole scene. Lychee's example: a scene 6 cm tall at a 50 μm (0.05 mm) layer height makes 1,200 slices.
The formula is layers = height ÷ layer height. Tilting a long part up into the build height adds layers.
Tanuki's Vault Boy shows the effect on a small part. Raw, Body.stl stands 65.0 mm tall as exported. The studio's presupported version is tilted and lifted on supports to 100.0 mm. At 0.05 mm layers, that is 1,300 layers against 2,000.
Time. Each layer is one full cycle of the printer: lift, return, wait and exposure. Time per plate = layers × seconds per layer. The tallest part on the plate sets the layer count for everything else on it.
To find your seconds per layer, Lychee suggests timing ten full cycles on your printer and dividing by ten. Then a 100.0 mm part at 0.05 mm layers takes 2,000 × that many seconds.
Supports. A tilted part has more surface facing down, and that surface needs supports. Lychee's guide to orientation describes the 45-degree method this way: "lots of supports all over the model" and "tall supports that often are almost the height of the print". More supports mean more marks to clean up afterward. How to remove supports from resin prints covers that work.
Presupports. If the studio supported a part flat, tilting it means supporting it again. The studio's supports are placed for the studio's orientation.
Plate space. A part tilted up the long side of the plate uses that whole length. Little else fits beside it.
Tilting also changes how much area each layer has. Lychee's guide to model sizes names large cross-sections as a cause of higher suction force. How to hollow resin prints covers that side of it.
Splitting a part that won't fit
When a part fails the flat check and tilting can't save it, cut it into pieces that each fit. The cut goes where it will be easiest to hide, and the pieces need a way to line back up.
Where to cut
- Look for a seam the figure already has: a belt, a hem, a sleeve cuff, a collar, the line where hair parts.
- Prefer a spot that another part covers once the figure is built.
- Cut through a thick section, so the glue face is large and there is room for a key.
- Keep cuts away from faces, hands and smooth skin.
- Check that each piece passes the sort-and-compare test, with height to spare for supports.
Working it out on curse.stl
On paper, there are two ways to make the cursed spirit fit a Saturn-class plate.
Trim the short side. The box is 128.5 mm on its shortest side. Remove at least 5.5 mm of reach on that side, or 5.62 mm for a Saturn 3 Ultra. Then the box passes with 190.3 mm along the long side and 240.8 mm standing up.
Look at what sets that 128.5 mm. If it is a single fin or prong, cutting that one piece off may be enough.
Standing 240.8 mm tall leaves 9.2 mm of height for supports and raft on a Saturn-class plate. On a Saturn 3 Ultra it leaves 19.2 mm. At 0.05 mm layers, 240.8 mm is 4,816 layers.
Cut across the long side. Cut across the 240.8 mm length. Each piece's box has to come out under 123 mm on one side. Then each piece can lie flat.
The shape makes this harder than the box suggests. The spirit is a coil with a bulb head, two prongs, thin fins and a forked tail. For all its size, the part is spread thin across that whole envelope. So cuts land on thin sections, and the pieces are fragile on the plate. Check every piece's box in Lychee after the cut, because a coil cut in half doesn't split its box in half.
Keys and pins
A key is a peg on one cut face with a matching socket on the other. It lines the pieces up and adds glue area. A pin is a metal rod glued into holes drilled in both faces after printing. Pins carry weight. How to assemble a garage kit figure covers pinning.
As of October 2026, Lychee Slicer 8.0 adds Assembly Keys. Lychee's changelog says: "You can now create assembly keys to solve alignment issues, ensure perfect fit, and secure your printed parts with precision."
The cut itself is Lychee's Planar Cut. Lychee describes it as a way to "cut your 3D model into manageable sections for easier printing and to remove unwanted parts". Split is a different tool. It divides a model's separate shells into separate objects on the build plate.
Cutting a part in Lychee
Cutting splits an oversized part into pieces that each fit the plate, and a key across the cut lines the pieces up again when you glue them. Cut the raw STL file, not the presupported one, and save the scene under a new name first so the uncut part stays safe. Then check each piece's size with the sort-and-compare test before you hollow and support it. Lychee's Planar Cut documentation covers the cut, and its Lychee 8 announcement introduces Assembly Keys. Both tools are on Lychee's paid Plus tier.
Planar Cut makes flat cuts. A curved cut line, such as one that follows a fold of cloth, needs other software. For advanced Boolean cutting, Lychee points users to dedicated modeling software.
Rescaling a kit to fit
You can print a kit smaller so its largest part fits your plate, or larger for a bigger figure. Scaling multiplies every length by the same factor. Some parts of a kit don't survive that well.
Working out the factor
To fit a plate, divide the plate side by the part's tight side. For curse.stl on a Saturn-class plate: 123 ÷ 128.5 = 0.957, or 95.7%.
Round down to leave a margin. At 95%, curse.stl becomes 122.1 × 180.8 × 228.8 mm, sorted. That fits a Saturn-class plate, with 21.2 mm of height left for supports and a raft. It also fits a Saturn 3 Ultra, with 0.8 mm to spare on the short side. The whole kit then has to go to 95%, and the spirit's thin fins get 5% thinner.
To go from one scale to another, divide the old second number by the new one. From 1/10 to 1/8: 10 ÷ 8 = 1.25, or 125%.
- From: 1/10
- To: 1/12
- Sum: 10 ÷ 12
- Factor: 83.3%
- From: 1/10
- To: 1/8
- Sum: 10 ÷ 8
- Factor: 125%
- From: 1/10
- To: 1/7
- Sum: 10 ÷ 7
- Factor: 142.9%
- From: 1/10
- To: 1/6
- Sum: 10 ÷ 6
- Factor: 166.7%
You can also scale to a target height: target height ÷ height on the scale sheet. A 205 mm figure printed to stand 250 mm tall needs 250 ÷ 205 = 1.22, or 122%.
Lychee's Measure tool can scale one part to a size you choose. You select two points on the object and enter a new value, and Lychee scales the whole object evenly. Use it to find the factor on the main body, then apply that same factor to every other part.
Every side grows, and resin grows faster
Every side of the bounding box changes by the factor. Double Tanuki's raw Vault Boy Body.stl and it becomes 99.4 × 178.0 × 130.0 mm. Sorted, its shortest side is 99.4 mm, over a Mars-class plate's 90 mm. Its longest side is 178.0 mm, over the plate's 175 mm height. The part no longer fits a Mars-class plate in any flat orientation.
Resin changes by the factor cubed. At 125%, a part uses 1.25 × 1.25 × 1.25 = 1.95 times the resin.
So printing a kit a quarter larger nearly doubles the resin it takes, and the resin cost with it. To put a figure on it for your own kit and resin, see how to estimate how much resin a print uses.
Thin parts get thinner
Scaling down shrinks thickness along with everything else. A strand of hair 1.0 mm thick at 1/10 is 0.83 mm thick at 1/12.
Volume falls faster than length. At 50%, a part keeps half its length and one-eighth of its volume.
NomNom's Moogle King Mog has a staff, King Moogle Staff.stl, that is 40.0 mm long. That kit post already calls it a rod close to the width of a support tip. At 50%, it would be 20.0 mm long and half as thick.
Before you scale down, find the thinnest parts in the kit. Kit posts list them under print difficulty.
Pegs and sockets stop fitting
A studio may leave a small gap between a peg and its socket, so the parts slide together. That gap scales with everything else.
Scale down, and the gap shrinks. A snug fit can become a peg that won't go in. Scale up, and the gap grows. A snug fit can turn loose.
Pegs only line up when both parts got the same factor. A head scaled to 125% won't seat on a neck scaled to 120%.
Scale every part by the same factor
Scale the raw STL files, not the presupported ones. NomNom and Tanuki both warn against rescaling their presupported files, and presupported vs unsupported STL files explains why.
- Work out the factor once.
- Write it in a text file in the kit folder, with the date and the version you scaled. How to organize STL files covers folder habits.
- Scale every raw part of the version you are printing by that same percentage, including the base and the alternate parts. Use uniform scaling, so all three sides of each part change together. Lychee's Scale page shows where the setting is.
- Run the sort-and-compare test again on the largest parts. They may have outgrown your plate.
- Save the scene with the scale in its name.
Reference cubes
A reference cube is a small cube of known size. You scale it with the parts and print it on the same plate. After printing, you measure it with calipers.
If the cube comes out at the size you expect, the factor went in correctly. If it doesn't, check the percentage you typed and your printer's calibration.
- Import the cube with the parts.
- Apply the same percentage to the cube.
- Work out its expected size: original edge × factor. For example, a 10 mm cube at 125% should measure 12.5 mm.
- Print the cube on the same plate as the first parts.
- Measure all three edges with calipers after the IPA clean and UV cure.
A cube that is off on one axis only points to the printer, not the scale. Resin exposure test: how to calibrate your printer covers that.
Scale and part size
Scale is a ratio. A 1/10 figure is one-tenth the height of the character it shows, and a 1/6 figure is one-sixth. The bigger the second number, the smaller the figure.
A character 170 cm tall is 1,700 ÷ 10 = 170 mm tall at 1/10, and 1,700 ÷ 6 = 283 mm at 1/6. To rerun it, divide the character's height in mm by the second number.
Compare those heights with the plates. A one-piece 1/10 figure of this character only just fits under a Mars-class plate's 175 mm height. A one-piece 1/6 figure is taller than either plate can build. That is one reason figure kits come in parts.
In my own kit posts, 1/10 is the scale named most often. It appears in 30 posts. 1/8 and 1/6 appear in one post each.
Why scale doesn't tell you part size
Scale fixes the ratio, not the height or the part sizes. Four things move them: the character, the pose, the base, and whatever rises above the head.
Character height. A taller character makes a taller figure at the same scale. Many characters have no official height, so the figure's size is the studio's choice. Chibi kits change proportions altogether, so their scale tells you even less.
Pose. A crouch, a seated pose or a kneel is shorter than a standing pose. A leap, a raised arm or a sword held overhead can make the figure taller than the character. A wide stance or outstretched arms make the footprint wider, and width matters for plate fit as much as height does.
Base. The base adds height under the feet, and it can be the biggest part of the kit. In my library, Chibi Station's Akuma stands roughly 32 cm on its guardian-head base, estimated from the files. The base alone is a large solid part. In Chibi Station's Aldebaran, the base is by far the biggest part of one build.
Hair, weapons and effects. Flowing hair, a raised weapon, wings, flames, water and energy effects add height and width. They often set the size of the largest part. In Yuki Tsukumo, that is the cursed spirit. In Aira Shiratori, the hair part is 152.2 × 181.2 × 125.2 mm, while the head part, Head1.stl, is 94.4 × 104.9 × 99.7 mm.
So read two numbers before you plan a print. One is the listed height of the figure. The other is the size of the largest single part.
How to read a scale sheet
A scale sheet is the studio's size chart. It is usually an image or a text file in the download.
- Find which version each number belongs to. A sheet can list full, split and bust sizes separately.
- Check whether the height includes the base.
- Read the width and depth, not only the height. A wide pose or base decides plate fit as often as height does.
- Check the units. Some sheets use mm, some cm, some inches.
- Note which scale the numbers are for. If the sheet is for 1/10 and you print at 1/8, multiply every number by 1.25.
- Use the full height for shelf space only. For plate fit, use the largest single part.
Tanuki Figures includes a Printing & Scale Guide.txt in its downloads. It lists the figure's height, width and depth, and a scale table.
File names can mislead. NomNom's 1/10 semi-split files carry a 178mm_ prefix whether the kit stands 166 mm (Lady Death), 192 mm (Carl) or 280 mm (Amaterasu). The prefix marks the 1/10 files, because a character 178 cm tall is 178 mm at 1/10. Take the real height from the scale sheet.
Heights across my library
Twenty of my kit posts state a height in their "Versions and sizes" line. The median of those heights is 205 mm.
The three shortest are all NomNom chibi kits: Rem and Ram at 53 mm, Tank at 69 mm and Carbuncle at 84 mm. The tallest is Tanuki's Tanjiro Kamado at 401 mm. Tanuki's San is 356 mm, and Tanuki's Kento Nanami and Spike Spiegel are 322 mm each.
A 401 mm figure is 151 mm taller than a Saturn-class plate can build. It still prints, because it comes in parts. The listed height is the built figure. Plate fit is about each part.
Watch and read next
Videos
- Lychee — "Planar Cut Tool in Lychee Slicer : Overview." Watch on YouTube. Lychee's own overview of the Planar Cut tool used in the splitting section.
- I Print 3D minis — "Using the Split Command - Lychee Slicer Software 3D Printing How-To." Watch on YouTube. A short look at Lychee's Split command, which separates a model's shells into their own objects.
- Lychee — "Q&A with Lychee Slicer: Scaling Pre-Supported 3D Models." Watch on YouTube. Lychee answers questions about scaling files that already have supports.
- MimicHobby — "Scale Your 3D Prints Right | Lychee Slicer Tutorial." Watch on YouTube. A tutorial on scaling models in Lychee.
- I Print 3D minis — "Orientation Why it's important - Lychee Slicer | 3D Printing." Watch on YouTube. Why the angle you set in Lychee changes the print.
- Slice of Anime — "What are "Scale" Anime Figures?" Watch on YouTube. Compares the sizes of anime scale figures.
Reading
- Scale — Lychee Documentation: the Scale tool, the Scale panel and Uniform Scaling.
- At Scale — Lychee Documentation: Physical Size Mode, for previewing a figure at its real size on screen.
- Lychee Slicer 8.0.0 — Lychee: the release notes that add Assembly Keys.
- ELEGOO Saturn 3 Ultra 12K Resin 3D Printer — ELEGOO US: the full spec table, including build volume and layer thickness range.
Sources
- ELEGOO Saturn 3 Ultra 12K Resin 3D Printer — ELEGOO US
- Elegoo Saturn 4 Ultra 16K — ELEGOO US
- Elegoo fully reveals Mars 5 and Mars 5 Ultra 3D printers — All3DP
- Elegoo Saturn 4 Ultra 12K review — MakerHacks
- Scale — Lychee Documentation
- Rotate — Lychee Documentation
- Tools panel — Lychee Documentation
- Measure — Lychee Documentation
- At Scale — Lychee Documentation
- Configuration: Menus — Lychee Documentation
- Configuration: Print Time Override — Lychee Documentation
- Export 3D — Lychee Documentation
- Slicing — Lychee Documentation
- Model Orientation — Lychee Documentation (J3D Tech's guide to resin printing)
- Model Sizes — Lychee Documentation (J3D Tech's guide to resin printing)
- All Lychee Slicer Resin and FDM Features — Lychee
- Lychee Slicer 8.0.0 — Lychee