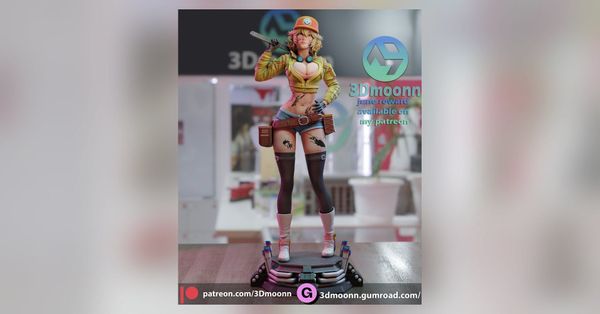
What is a garage kit figure? 3D-printed kits explained
What is a garage kit figure? Unpainted resin parts you build and paint: what a 3D-printed kit holds, what it costs, and how it differs from a store figure.
A garage kit figure is a figure you build and paint yourself from a set of unpainted resin parts. The first garage kits were cast in resin by hobbyists and sold in small runs. 3D-printed kits are the newer kind: you buy the parts as files and print them at home.
A 3D-printed kit is a folder of files. The folder holds one STL file for each part, and often presupported copies, slicer scenes and studio renders. You print the parts on a resin printer, then clean, build and paint them.
One real kit folder from my library, NomNom Figures' Beelstarmon, is the example all the way through.
In this guide
- Garage kit vs store figure vs model kit
- What are garage kit figures made of?
- What does GK mean?
- How garage kits are made, then and now
- What a 3D-printed kit download holds
- How to read studio renders
- Kit versions and what each means for the build
- Where the name "garage kit" comes from
- What you need to start
- How this site sorts kits and lays out a kit post
- Watch and read next
- Sources
Garage kit vs store figure vs model kit
A store figure is finished when it arrives. A garage kit figure is finished when you finish it. A plastic model kit sits between the two: you build it, but the parts come in color.
Store figures and plastic model kits
Scale figures. Hobbyco's figure glossary defines a scale figure as a collector figure made to a set size ratio. It is typically prepainted PVC or resin, designed for display.
One example is Good Smile Company's Saber/Katsushika Hokusai, a painted ABS and PVC figure at 1/7. It is about 240 mm (9.4 in) tall, with a stand, and its listed price is ¥29,800. Beelstarmon's scale sheet gives 237 mm, so the two figures stand about the same height on a shelf.
Prize figures. The same glossary defines a prize figure as a mass-produced figure first made as a prize for Japanese arcade crane games. Prize figures are now sold through hobby shops too. Gundam Planet's guide to prize figures puts them at about $15 to $30, against about $150 to $300 for higher-end figures. The guide names seam lines and uneven paint as common on lower-priced prize figures.
Plastic model kits. Bandai's Gunpla (Gundam plastic model) kits are one example. Wikipedia's Gunpla article says the parts arrive on runners, in the form they leave the injection molding machine. Each part is molded in color, which gives the finished model a basic color scheme. Since the late 1980s, the kits assemble without glue or special tools.
Wikipedia's garage kit article sets the two side by side. Garage kits are usually made in limited numbers and cost more than injection-molded plastic kits, which are made in many thousands.
Side by side
- What arrives
- 3D-printed garage kit: STL files and studio renders
- Scale figure: A built, painted figure, usually with a stand
- Prize figure: A built, painted figure
- Plastic model kit: Plastic parts on runners, molded in color
- What you do
- 3D-printed garage kit: Print, IPA clean, UV cure, remove supports, build, prime and paint
- Scale figure: Unbox it and display it
- Prize figure: Unbox it and display it
- Plastic model kit: Cut the parts from the runners and fit them together
- What you pay
- 3D-printed garage kit: The files, the resin and your supplies, plus a printer once
- Scale figure: About ¥29,800 for the 240 mm example above
- Prize figure: About $15 to $30
- Plastic model kit: The kit
- Time
- 3D-printed garage kit: Printer hours, plus your own time to clean, build and paint
- Scale figure: None after delivery
- Prize figure: None after delivery
- Plastic model kit: Your own time to build
- Scale
- 3D-printed garage kit: Any size your build plate can fit
- Scale figure: The size the maker sells
- Prize figure: The size the maker sells
- Plastic model kit: The size the maker sells
- Colors
- 3D-printed garage kit: Your choice of resin and paint
- Scale figure: The factory's paint
- Prize figure: The factory's paint
- Plastic model kit: The plastic's colors, or your own paint
- Pose options and alternate parts
- 3D-printed garage kit: Everything the studio includes, and you can print more than one
- Scale figure: What the box includes
- Prize figure: What the box includes
- Plastic model kit: What the box includes
- A broken part
- 3D-printed garage kit: Print it again from the STL file
- Scale figure: Repair it by hand
- Prize figure: Repair it by hand
- Plastic model kit: Repair it by hand
Do you have to paint garage kits yourself?
Yes. A garage kit comes unpainted, and the paint is part of the hobby. Wikipedia notes that most garage kits are sold in parts for the buyer to assemble and finish.
A printed kit has no color in its files either. An STL file holds shape only, so the colors in the studio renders are a paint reference. The guide to how to paint garage kit figures covers the paint.
If you want to skip the printer but not the paint, my shop sells printed, unpainted kits. It ships to the US only.
How much do garage kit figures cost?
Are garage kit figures cheaper than store figures? Once you own a printer, one kit's files often cost about what a prize figure costs, and less than a scale figure. The printer and supplies are the large cost, and you pay for them before the first kit.
A kit has three kinds of cost: the files, the resin, and the equipment.
The files. A Patreon month or a single kit. NomNom Figures' Patreon starts at $10 a month, and Tanuki Figures' Link Chibi is $15 on Gumroad. A Patreon month can bring more than one kit. Lion Realm's lists 3 characters a month.
The resin. Kit posts on this site don't estimate resin until I have sliced and printed the kit. To work out what a kit takes, and what that costs at your own resin's price, see how to estimate how much resin a print uses.
The equipment. A printer, a way to IPA clean and UV cure parts, tools, primer and paint. You buy these once and use them for every kit. The guide to what size resin printer you need for figures covers the biggest item.
What you get to choose
A store figure is one decision: buy it or not. A kit is a series of decisions, and that is the point of it.
Scale. You can print a kit larger or smaller than the studio's size. Check the scale sheet and your build plate first.
Colors. The studio's renders are a reference, not a rule. You can follow the colors part by part or paint your own scheme.
Pose options. Some kits ship more than one build. Chibi Station's Doctor Doom builds with a fist or with a cube, from 9 or 10 parts. The same folder holds a one-piece statue.
Alternate parts. Lion Realm's Thomas Andre kit includes unmasked heads. Chibi Station's All Might kit includes two heads. Tanuki Figures' John Wick kit adds a shattered-glass alternate set of 15 parts.
The other side of the trade is the work. Seams, support marks and joins are yours to clean up. The guides to how to remove supports from resin prints and how to assemble a garage kit figure cover that work.
Are garage kit figures hard to build? That depends on the kit, and the guide to building your first garage kit figure covers picking a first one.
What are garage kit figures made of?
Most garage kit figures are resin. Wikipedia's garage kit article also calls a garage kit a "resin kit," and names polyurethane resin as the most common material. Soft vinyl and white metal, a lead alloy, are also used.
A cast kit and a printed kit both use resin, but not the same resin.
- Cast kits: polyurethane resin. Casting resin comes as two liquids, a base and a hardener. Wonder Festival's garage kit page (in Japanese) says to mix the two by weight, and hardening starts right after mixing. The caster pours the mix into a silicone mold.
- 3D-printed kits: photopolymer resin. Printing resin hardens under UV light. Elegoo's ABS-like resin page calls it a photopolymer resin. The printer hardens each part one thin layer at a time.
Either way, the parts are unpainted when you get them.
What does GK mean?
GK is short for garage kit. Chinese Wikipedia's figure article gives GK as the abbreviation, and says the term usually means a kit made in small numbers.
In Japanese, a garage kit is ガレージキット (garēji kitto), the spelling Wonder Festival uses. The short form is ガレキ (gareki), as Pixiv Encyclopedia notes.
Some shops also use "GK figure" or "GK statue" for a finished, hand-painted resin statue, like this Museum Grade GK Figure. A garage kit arrives unpainted and in parts. Look for those words in any "GK" listing before you buy.
How garage kits are made, then and now
A cast kit was copied by hand, one copy at a time. A printed kit is made once, in software, and each buyer prints a copy.
Cast kits
Wonder Festival's garage kit page explains the method. An enthusiast sculpts an original, makes a silicone mold from it, and casts copies in resin. In order:
- Sculpt the original figure. This is the prototype every copy comes from.
- Set the original in clay and pour silicone rubber over it to make a mold.
- Cut channels into the mold so liquid resin can flow in.
- Mix the liquid resin by weight.
- Pour the resin into the mold, let it harden, and pull the cast part.
- Repeat step 5 for each copy.
Every copy takes hand work, so cast kits sold in small runs. A Wonder Festival history column defines garage kits as "model kits produced in smaller numbers with labor-intensive casting processes."
The buyer got a box of unpainted parts and glued them with cyanoacrylate (super glue) or epoxy, Wikipedia says. The same column says cast kits are often harder to assemble and color than mass-produced plastic models. That is still true of printed kits. The build and the paint are the hobby.
3D-printed kits
The studio now sells the files, not the cast parts. The studio sculpts the model in software, cuts it into parts, and exports each part as an STL file. The casting step moves to your home, and your printer does it.
Printing at home changes five things for you.
- You print the copies. A part that fails or breaks can be printed again from the same STL file.
- You choose the resin. That includes the type of resin and its color.
- You choose the size. A slicer can scale an STL file up or down. A part that grows may stop fitting your build plate, and thin parts get thinner when a kit shrinks. The guide to will it fit your printer covers this.
- You do the setup the caster used to do. Each part needs an orientation on the build plate, supports, and sometimes hollowing. Presupported files do most of this for you. See presupported vs unsupported STL files and how to hollow resin prints.
- Your kits are files. They take disk space and need a backup. My library holds 519 kits from 18 studios, kept on an external drive with a second drive as a copy. These are the kits I have, not everything each studio offers. The guide to how to organize STL files covers the rest.
Where studios sell kit files
Studios sell files through four common channels. Prices are as of October 2026.
- Patreon
- How you pay: A monthly membership
- What you get: That month's releases, in the files your tier includes
- Example: NomNom Figures, from $10 a month
- Gumroad
- How you pay: One payment per kit
- What you get: One kit, as a download
- Example: Tanuki Figures' Link Chibi, $15
- Cults3D
- How you pay: One payment per file, or free
- What you get: One kit or one file
- Example: A marketplace for many designers
- MyMiniFactory
- How you pay: One payment per kit, or a monthly Tribe
- What you get: One kit, or a creator's monthly releases
- Example: Store purchases and Tribes
Patreon. A studio posts its releases to paying members each month. NomNom Figures' Patreon page says the studio has made character STL files since 2021, in game, movie and anime categories. Lion Realm's page lists 3 characters each month at 1/6, with presupported files and STL formats.
Gumroad. A studio sells one kit at a time. The Link Chibi download includes the chibi STL file, a presupported copy, the base, render images, and presupport files in STL and LYS (Lychee Slicer) formats. The listing gives the size as 56 × 60 × 102 mm (2.2 × 2.4 × 4.0 in).
Cults3D and MyMiniFactory. Cults is a marketplace for free and paid files, founded in 2014 in France. By May 2025 it listed about 2.3 million models. MyMiniFactory sells single kits and runs a monthly subscription called Tribes. Its FAQ says a download arrives as a zip file or a single STL file.
Studios sell personal tiers, and some also sell commercial tiers. A commercial tier lets the buyer sell printed copies on the studio's terms. Lion Realm's page, for example, names commercial license rights in its LionMonarch and LionEmperor tiers. I hold commercial Patreon tiers with seven studios: NomNom Figures, Tanuki Figures, 3Dmoonn, Chibi Station, Moon Figures, Lion Realm and Hybris 3D Studios.
Patreon access, downloading a kit again, and backups are covered in how to organize STL files.
What a 3D-printed kit download holds
A kit download is a folder of part files plus pictures. The Beelstarmon kit from NomNom Figures is a typical one. Beelstarmon is a character from Digimon, and the kit builds one figure in one size.
The Beelstarmon kit folder
This is the folder as it sits in my library, as of 5 October 2026.
NomNom Figures - Beelstarmon - Digimon/
  Render Images/
    Beautyshot_01.png
    Beautyshot_02.png
    Colored_01.png
    Colored_02.png
    Colored_03.png
    Colored_04.png
    Turntable.jpg
    Scaleparts.jpg
  STL/
    base.stl
    torso.stl
    head.stl
    mask.stl
    hair.stl
    collar.stl
    l arm.stl
    r arm.stl
    l leg.stl
    r leg.stl
    l coat.stl
    r coat a.stl
    r coat b.stl
    l scarf a.stl
    l scarf b.stl
    r scarf a.stl
    r scarf b.stl
    l gun.stl
    r gun.stl
    rocket.stl
  Presupports/
    STL/
      NOM_base_Supported.stl
      NOM_torso_Supported.stl
      ... (20 files, one per part)
    Lychee/
      ... (20 .lys scenes, one per part)
That is 68 files: 8 render images, 20 raw STL files, 20 presupported STL files and 20 Lychee Slicer scenes. The folder is about 1.2 GB on disk.
Beelstarmon is close to typical for my library. The median kit folder holds 28 STL files, counting raw and presupported copies separately, and is about 1.2 GB. Beelstarmon has 40 STL files at the same size.
The raw STL files
The STL/ folder holds the raw parts, one STL file per part. The Library of Congress format description explains what an STL file holds. It describes only the surface of an object, as triangles, with no color or texture. 3D Systems first documented the format in 1988 for stereolithography.
So an STL file is shape only. The colors you see in the renders are not in the STL files. They are the studio's paint reference.
"Raw" means no supports (also written "unsupported STL"). The raw files are also solid, with no hollow inside. If you print raw files, you add supports yourself, and you decide whether to hollow the larger parts.
The file names follow a pattern. The letters l and r mean left and right. The letters a and b mark one piece that comes in two parts, such as r coat a.stl and r coat b.stl.
Grouped by what they build, the 20 parts are:
- Figure
- STL files:
torso.stl,head.stl,mask.stl,hair.stl,collar.stl,l arm.stl,r arm.stl,l leg.stl,r leg.stl - Count: 9
- STL files:
- Coat
- STL files:
l coat.stl,r coat a.stl,r coat b.stl - Count: 3
- STL files:
- Scarf
- STL files:
l scarf a.stl,l scarf b.stl,r scarf a.stl,r scarf b.stl - Count: 4
- STL files:
- Accessories
- STL files:
l gun.stl,r gun.stl,rocket.stl - Count: 3
- STL files:
- Base
- STL files:
base.stl - Count: 1
- STL files:
Kit posts on this site group the parts by what they build in the same way, in their "What's in the download" section.
The presupported STL files
The Presupports/STL/ folder holds the same 20 parts with supports already added by the studio. Each name adds NOM_ at the front and _Supported at the end. So torso.stl pairs with NOM_torso_Supported.stl, and l arm.stl pairs with NOM_l arm_Supported.stl.
Supports are thin printed rods that hold a part while it prints. They usually stand on a raft, the flat base that sits on the build plate. A presupported file means the studio has chosen the angle and placed the supports.
You can print the presupported files as they are, or edit them. The guide to presupported vs unsupported STL files covers both paths.
The Lychee Slicer scenes
The Presupports/Lychee/ folder holds 20 scenes in Lychee Slicer's .lys format, one per part. Lychee's documentation says a .lys file "self contains all the objects and Lychee Slicer preparation work."
Opening a scene shows the part placed and supported as the studio set it up. I slice in Lychee Slicer on a Mac, so these scenes open directly for me. If you use another slicer, use the presupported STL files instead.
Other things a kit folder can hold
Not every studio packs a kit the same way. My library holds 29,102 files, 19,399 of them STL files, in about 1.0 TB. Across those folders, these other kinds of files turn up:
- Other slicer projects. Some studios ship Chitubox projects instead of Lychee scenes. Moon Figures' Shionne kit ships its supported, plated setup as
stl/Shionne.chitubox, with no separate presupported STL files. - Raw files only. Most of the Chibi Station kits I have ship raw STL files only, with no presupported files and no slicer project. You support every part.
- Files for filament printers. Bee Figures' Statue of God kit includes a 3MF set for FDM (filament) printing, beside its resin STL files.
- Eye decals. 55 kits in my library ship eye decal files, most of them from Moon Figures. The Rio Futaba kit is meant to get its eyes from
eyes_RioFutaba.psd, printed on decal paper. - Merged files. Some kits include the figure as one merged piece beside the split parts.
- Alternate parts. Alternate parts are swap parts, such as a second head, other hands or a second base.
- A whole-scene file. Lion Realm's Spike Spiegel kit includes a
Scene.stlexport of the whole set.
The largest kit folder in my library, Tanuki Figures' Edward and Alphonse Elric diorama, is 11.7 GB.
How to read studio renders
Renders are the studio's pictures of the digital model. They show what the figure should look like before you print a single part.
A render is not a photo of a print. It shows the model lit and painted in software. Every render in a kit post on this site is captioned "Studio render," and my own photos are labeled as mine.
Studios ship four main kinds of render. Each one answers a different question.
- Color beauty shot
- What it shows: The painted figure, lit and posed for display
- What to use it for: Deciding whether you want the kit; the studio's color scheme
- In the Beelstarmon folder:
Beautyshot_01.png,Beautyshot_02.png, plusColored_01.pngtoColored_04.png
- Turntable, often gray
- What it shows: The unpainted sculpt from several angles
- What to use it for: Reading the shapes, the folds and the thin parts without paint in the way
- In the Beelstarmon folder:
Turntable.jpg
- Parts layout sheet
- What it shows: Every part laid out separately
- What to use it for: Counting parts, seeing where the cuts fall, matching STL file names
- In the Beelstarmon folder:
Scaleparts.jpg(the same image as the scale sheet)
- Scale sheet
- What it shows: The figure with its height, width and length in mm
- What to use it for: Shelf space, and which build plate the parts need
- In the Beelstarmon folder:
Scaleparts.jpg
Color beauty shots are the best guide to the studio's color scheme. Kit posts on this site turn them into a paint reference, material by material. Beelstarmon has two beauty shots and four more colored renders.
Turntables show the bare sculpt from several angles. With no paint in the way, thin parts, deep folds and cupped surfaces are easy to see. Those are the parts that need care on the printer.
Parts layout sheets show each part on its own. Use one to count parts against the STL folder, and to see where the joins will fall.
Scale sheets give the figure's size in millimetres. Beelstarmon's scale sheet gives 237 mm high, 187 mm wide and 142 mm long (9.3 × 7.4 × 5.6 in). The kit post takes its numbers from that sheet.
Kit versions and what each means for the build
Many kits come in more than one version. A version is one size or format of a kit, such as a 1/6 full figure or a 1/10 semi-split. The version you print decides the part count, the build plate you need, and how much assembly and painting you take on.
Kit posts describe plate fit in two classes, explained in full in will it fit your printer: a Mars-class plate is about 143 × 90 × 175 mm (5.6 × 3.5 × 6.9 in), and a Saturn-class plate is about 219 × 123 × 250 mm (8.6 × 4.8 × 9.8 in).
- Full
- What it is: The whole figure at the studio's main size, cut into many parts
- What it means for the build: The most parts and joins, and the largest parts
- Example in my library: Beelstarmon, 20 parts, 237 mm
- Semi-split
- What it is: The same sculpt cut into fewer, larger parts, often at a smaller scale
- What it means for the build: Fewer joins, but larger parts to fit, support and hollow
- Example in my library: NomNom Figures' 1/10 semi-split files
- Chibi
- What it is: The character with a large head and a short body
- What it means for the build: Often few, chunky parts, but not always small
- Example in my library: Tanuki Figures' Anya Forger, 3 parts
- Bust
- What it is: Head and shoulders on a base
- What it means for the build: Few parts, and the face is large
- Example in my library: Tanuki Figures' Satoru Gojo bust, 5 parts
- Diorama
- What it is: A scene, often with more than one figure
- What it means for the build: Many parts, a large base, a long build
- Example in my library: Tanuki Figures' Edward and Alphonse Elric, 167 STL files
- Keycaps
- What it is: Sculpted keycaps for a mechanical keyboard
- What it means for the build: One piece each, with a stem that must fit a switch
- Example in my library: NomNom Figures' Happy keycaps
Full
A full version is the whole figure at the studio's main size. It comes cut into parts at the joins the studio chose. Beelstarmon is a full figure in one size: 20 parts, 237 mm high, and all 20 parts fit a Mars-class plate.
Among the kit posts with a clean height reading, the median height is 205 mm (8.1 in). The tallest is Tanuki Figures' Tanjiro Kamado at 401 mm (15.8 in).
Big parts can outgrow a printer. Lion Realm's Yuki Tsukumo includes curse.stl at 190.3 × 240.8 × 128.5 mm (7.5 × 9.5 × 5.1 in). That part fits no Saturn-class plate in any flat position, so the kit post says it has to be cut.
Semi-split
A semi-split version keeps the same sculpt but cuts it into fewer, larger parts. In my NomNom Figures kits, the 1/10 semi-split part files carry a 178mm_ prefix. A person 178 cm (5 ft 10 in) tall stands 178 mm (7.0 in) at 1/10.
The prefix stays the same across kits of different heights. NomNom's Carl, Lady Death and Amaterasu all carry it, at 192 mm (7.6 in), 166 mm (6.5 in) and 280 mm (11.0 in). Read the prefix as the scale label, and take the real height from the scale sheet.
Fewer parts does not mean an easier print. NomNom's Jiraiya kit rates 3/5 for printing in its split, 75 mm (3.0 in) and bust versions, and 5/5 in its semi-split version. Larger parts are harder to fit on a build plate and to hollow. Check the print rating for each version in the kit post.
One-piece and merged
Some kits add a merged version, with the figure as a single piece. Chibi Station's Spider-Man folder holds the figure split into six parts and the same figure merged into one. A merged figure has almost nothing to assemble. Chibi Station's Doctor Doom one-piece statue rates 1/5 for assembly, against 3/5 for the split kit.
Chibi
A chibi version shows the character with a large head and a short body. In my library, the three shortest kits with a clean height reading are all chibis. The shortest, NomNom Figures' Rem and Ram chibi, is 53 mm (2.1 in) high.
Small and chunky usually means an easier print. Tanuki Figures' Anya Forger chibi is three parts, all presupported, all fitting a Mars-class plate. Printed from its presupported files, it rates 1/5.
Chibi does not always mean small, though. Chibi Station's Aira Shiratori has a hair part of 152.2 × 181.2 × 125.2 mm (6.0 × 7.1 × 4.9 in). It fits neither a Mars-class nor a Saturn-class plate flat, and the kit has no presupported files. It rates 5/5 for printing.
Bust
A bust is the head and shoulders on a base. A bust puts the face at a large size without a full figure's part count. Tanuki Figures' Satoru Gojo bust is five parts per build: base, torso, hand, head and hair piece. The glasses make six. It rates 2/5 for assembly.
Diorama
A diorama is a scene. It often holds more than one figure on a large base. Tanuki Figures' Edward and Alphonse Elric diorama holds 167 STL files in an 11.7 GB folder, the largest in my library. NomNom Figures' Dragonborn vs Frost Troll diorama holds 83 STL files.
A diorama often has a base in several pieces. Those pieces have to line up before the figures go on.
Keycaps
Keycap kits are small sculpted caps that sit on the switches of a mechanical keyboard. NomNom Figures has released several, including Happy and Keroberos.
Each keycap is one piece, so both rate 1/5 for assembly. The work is in the fit. Sand any support marks off the bottom rim so the cap sits level. If the stem socket comes out tight, scrape it with a hobby knife. If it is loose, add a small drop of glue.
Packs and add-ons
Some downloads are not one figure at all. Chibi Station has released keychain packs and picture frame packs. Its Akuma, Kakashi, Leonardo, Magneto and Zaraki frame pack puts each character in relief on a 100 mm (3.9 in) panel. NomNom Figures has released add-on heads, such as a Fern head.
Where the name "garage kit" comes from
The name comes from hobbyists who made figure kits at home because nobody sold the figures they wanted. Wikipedia's garage kit article says the term comes from hobbyists who used their garages as workshops. Shuichi Miyawaki, president of the Osaka figure maker Kaiyodo, traces garage kits to the late 1970s.
In Japan, two Osaka businesses shaped the early scene. General Products opened on 14 February 1982 and was the first shop to sell licensed garage kits, with licenses from Tsuburaya (Ultraman) and Toho (Godzilla). Kaiyodo, a model shop since 1964, started making its own garage kits in 1980.
General Products started Wonder Festival, a garage kit event. The first full event was held on 13 January 1985 at the Tokyo Metropolitan Trade Center, with about 2,000 visitors. General Products closed in 1992, and Kaiyodo took over the festival at about that time.
Wonder Festival is still held twice a year, in summer and winter, at Makuhari Messe in Chiba, and it marked its 40th anniversary in 2025. Its own page says that in recent years, 3D-printed pieces and soft vinyl figures have joined resin-cast works at the show.
What you need to start
To start, you need a resin printer, a safe place to run it, a slicer, and a way to IPA clean and UV cure parts. Resin printer setup at home lists that printing gear. The tools, primer and paint to finish the figure are listed in the first-build guide. Read resin printing safety before you open a bottle of resin.
What I use
I print on four Elegoo Saturn 3 Ultra printers. Each has a build volume of 218.88 × 122.88 × 260 mm (8.6 × 4.8 × 10.2 in), per Elegoo's Saturn 3 Ultra page as of October 2026.
I clean and UV cure parts with two Elegoo Mercury XS bundles, each with a separate wash station and cure station. I use Elegoo ABS-Like Resin V3.0, and I slice in Lychee Slicer on a Mac.
You do not need four printers to build one kit. You need one printer that fits the parts.
From download to figure
These are the steps from a kit folder to a finished figure, in short:
- Check that the kit's largest part fits your build plate.
- Print the presupported files, or support the raw files yourself.
- IPA clean and UV cure each part, then remove the supports.
- Glue the parts together.
- Prime and paint the figure.
The guide to how to build a garage kit figure covers each step in order.
How this site sorts kits and lays out a kit post
Every kit on this site gets a kit post, filed in one of three sections:
- Anime holds kits of characters from anime and manga.
- Fan art holds kits of characters from games, comics, books and western animation.
- Originals holds a studio's own designs, with no outside source.
As of 5 October 2026, I have drafted more than 470 kit posts. About 300 are Anime, about 170 are Fan art, and 2 are Originals. The site has two newsletters, Anime and Fan art.
How a kit post is laid out
Every "About this model" kit post has the same sections, in the same order, so two kits are easy to compare:
- At a glance. Studio, source, versions, parts, presupports, plate fit, ratings and status.
- The model. The pose, costume, face and base, from the studio renders.
- Versions and sizes. Each version with its size, part count and presupports.
- What's in the download. Every part, grouped by what it builds.
- Print difficulty. A rating out of 5, with the parts that drive it.
- Assembly difficulty. A rating out of 5, with the joins, pins and order.
- Paint difficulty. A rating out of 5, with a paint reference from the colored renders.
- Gallery. Every studio render, captioned.
- Links. Where to get the files.
Files reviewed, then printed
Kit posts start from the files and studio renders, before I print anything. Their status reads "files reviewed, not printed," and every rating is marked as an estimate. Beelstarmon's post is at this stage.
After I print a kit, it gets a review block. The review block holds print notes, assembly notes, paint notes, a verdict and my own photos. Its ratings replace the estimates.
The three ratings
Each kit post rates Print, Assembly and Paint from 1 to 5. The skill tag takes the highest of the three: beginner for 1 or 2, intermediate for 3, advanced for 4 or 5. Beelstarmon rates Print 3/5, Assembly 4/5 and Paint 4/5 (estimated), so it carries the advanced tag.
As of 5 October 2026, 461 kit posts carry ratings, and 315 of them rate Paint at 4 or 5. The full spread and the rating anchors are in how kits are rated here.
Watch and read next
Videos
- WAO RYU! ONLY in JAPAN — [4K HDR]Japan's biggest Figurine/Garage Kit Festival【Wonder Fest 2024 Winter】. A walk through the halls of Wonder Festival, winter 2024.
- TinyLittles3D — I Made an Anime Figure with a 3D Printer | Albedo Overlord. One anime figure taken from a 3D printer to a finished figure.
- Craftknights3D — How to 3D Print Anime Figures Easily. An introduction to printing anime figures on a resin printer.
- Figure Feedback — The 2025 Beginner's Guide to Lychee Slicer. The basics of Lychee Slicer, the slicer that opens
.lysscenes like Beelstarmon's. - Groundeffected — How To Paint Anime 3D Prints - Jujutsu Kaisen. Painting a 3D-printed anime figure.
Reading
- ガレージキットとは (What is a garage kit) — Wonder Festival. The festival's own explanation of how cast garage kits are made, in Japanese.
- From Garage Kits to Action Figures: The First 15 Years of Wonder Festival — Zimmerit. A detailed history of the event from 1984 on.
- STL (STereoLithography) File Format Family — Library of Congress. What an STL file holds, and what it leaves out.
- Export Scene — Lychee Documentation. What a
.lysscene file holds, and how it differs from a.lytfile.
Sources
- Garage kit — Wikipedia
- Gunpla — Wikipedia
- 手办 (Figure) — Chinese Wikipedia
- ガレージキット (Garage kit) — Pixiv Encyclopedia
- Interview #06: In a downpour, the gospel (Shuichi Miyawaki, Kaiyodo) — Route 2015, otakumode.com
- Column 1: Since 1980–1994 — Route 2015, otakumode.com
- ガレージキットとは (What is a garage kit) — Wonder Festival
- ワンダーフェスティバルとは (About Wonder Festival) — Wonder Festival
- Wonder Festival 2026 Winter, official English site — Wonder Festival
- 10 Years of General Products — Zimmerit
- From Garage Kits to Action Figures: The First 15 Years of Wonder Festival — Zimmerit
- The Creation of Fascinating Model Figures — Highlighting Japan, Government of Japan
- Nomnom Figures — Patreon
- LionRealm Studio — Patreon
- Link Chibi — Tanuki Figures on Gumroad
- Cults (3D printing marketplace) — Wikipedia
- FAQ — MyMiniFactory
- STL (STereoLithography) File Format Family — Library of Congress
- Export Scene — Lychee Documentation
- Anime Figures Glossary — Hobbyco
- Saber/Katsushika Hokusai — Good Smile Company
- What exactly are "Prize Figures"? — Gundam Planet
- ELEGOO Saturn 3 Ultra 12K Resin 3D Printer — Elegoo US
- ELEGOO ABS-Like Photopolymer Resin — Elegoo